Hello All
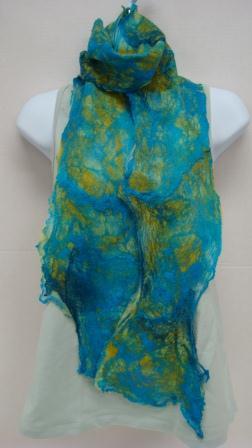
Today I am going to help solve that problem of what to do with the beautiful Silk Mawata or Hankies that you buy from us. Silk hankies and wool felted together make a gossamer scarf that weights almost nothing and yet provides wonderful warmth and a great spark of color!
In addition to your hankies and merino you will need:
- 6 feet of bubble wrap that is approximately 1 foot wide
- Twine or cotton string
- dish soap
- 1 foam pool noodle (you can cut your noodle to around 14 inches to make it easier to work with)
- 1 old bed sheet, towel or piece of fabric ripped to the size of your bubble wrap
I started out with less than 0.5 oz of silk hankies and less than 0.75 oz of wool. The finished weight of the scarf is just shy of 1 oz. The shrinkage on this project was minimal. I lost about half an inch in width and about 1 inch in length.
First, lay out your bubble wrap on a sturdy surface. Next, carefully peel the silk hankie bundle into cobweb thin squares and lay them on the bubble wrap.
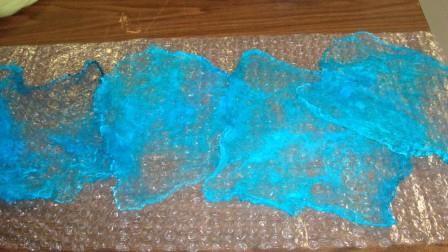
Since I wanted a scalloped edge to this scarf, I laid the sheer silk hankies at a diagonal to each other. If you want a straight edge to your scarf, lay the squares right next to each other. Now you are ready to add some more color!
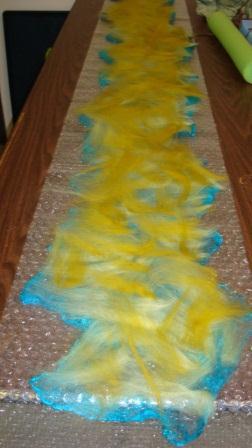
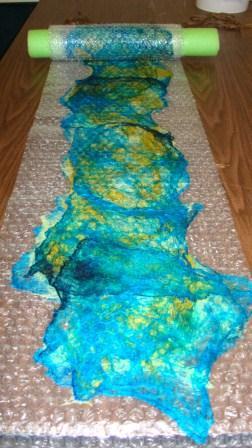
In my project I wanted two colors of merino to contrast with my silk hankies. You, of course, can choose as many color combinations as you want! Lay a thin layer of each of the colors of wool over your silk hankies. Finally top with another layer of stretched silk hankies. Top your silk and wool with a piece of fabric. Sprinkle your scarf-to-be with some HOT soapy water. You want all of the wool to be damp but no puddles.
Now comes the real work. Take the foam noddle and place it at one end. Start rolling your scarf around the foam until all the bubble wrap is around the noodle. Take your twine and secure the scarf tube.
Roll up your sleeves and start applying pressure! This step works best if you are standing. Roll the scarf wrapped foam along the table by applying pressure from your forearms. This can take some time! Completely unroll your scarf and check your progress. You can remove the piece of fabric at this time. Take the noodle and rewrap from the other end of the scarf. This insures even felting. When the fiber has felted to a point where it does not move around or pull away from the scarf you can start tossing the scarf on the table to finish it off! Use it as stress relief! Spank it about until it is felted to your liking. Rinse in cool clean water and lay out to dry. To make that silk really shine, iron your dried scarf on the silk setting. Wear and enjoy!!
Happy Felting
DD
Happy Felting
DD
No comments:
Post a Comment