Showing posts with label tutorial. Show all posts

Saturday, February 22, 2014

Mawata Silk Scarve - Tutorial

Hello All
Today I am going to help solve that problem of what to do with the beautiful Silk Mawata or Hankies that you buy from us. Silk hankies and wool felted together make a gossamer scarf that weights almost nothing and yet provides wonderful warmth and a great spark of color!
                         image
In addition to your hankies and merino you will need:
  • 6 feet of bubble wrap that is approximately 1 foot wide
  • Twine or cotton string
  • dish soap
  • 1 foam pool noodle (you can cut your noodle to around 14 inches to make it easier to work with)
  • 1 old bed sheet, towel or piece of fabric ripped to the size of your bubble wrap
I started out with less than 0.5 oz of silk hankies and less than 0.75 oz of wool. The finished weight of the scarf is just shy of 1 oz. The shrinkage on this project was minimal. I lost about half an inch in width and about 1 inch in length.
First, lay out your bubble wrap on a sturdy surface. Next, carefully peel the silk hankie bundle into cobweb thin squares and lay them on the bubble wrap.
 image
Since I wanted a scalloped edge to this scarf, I laid the sheer silk hankies at a diagonal to each other. If you want a straight edge to your scarf, lay the squares right next to each other. Now you are ready to add some more color!
                      image
In my project I wanted two colors of merino to contrast with my silk hankies. You, of course, can choose as many color combinations as you want! Lay a thin layer of each of the colors of wool over your silk hankies. Finally top with another layer of stretched silk hankies. Top your silk and wool with a piece of fabric. Sprinkle your scarf-to-be with some HOT soapy water. You want all of the wool to be damp but no puddles.
Now comes the real work. Take the foam noddle and place it at one end. Start rolling your scarf around the foam until all the bubble wrap is around the noodle. Take your twine and secure the scarf tube.
                           image

Roll up your sleeves and start applying pressure! This step works best if you are standing. Roll the scarf wrapped foam along the table by applying pressure from your forearms. This can take some time! Completely unroll your scarf and check your progress. You can remove the piece of fabric at this time. Take the noodle and rewrap from the other end of the scarf. This insures even felting. When the fiber has felted to a point where it does not move around or pull away from the scarf you can start tossing the scarf on the table to finish it off! Use it as stress relief!  Spank it about until it is felted to your liking. Rinse in cool clean water and lay out to dry. To make that silk really shine, iron your dried scarf on the silk setting. Wear and enjoy!!

Happy Felting
DD

Tuesday, December 3, 2013

Felted Yarn PODS

Hello All,

This is my newest fun project.  It's super easy, quick and they come out great!  I'm going to make more for the people I work with and fill them with candies or such for Christmas gifts.

I think knitting them up took me all of 3 hours per pod.  I used our newest yarn "Wickford", it's 100% merino wool, in a bulky single.  It takes the dye nicely and felts with little or no work.

I've included the link to the pattern I'm using.  
http://olma.blogspot.com/2007/06/pod-pattern.html 

It's easy to follow, even for me.  Alto I had to review my "Kids Learn to Knit" book to remember how to M1 or increase.  I know, duh!  I was able to figure it out and then the pod just came together by its self.  I knit the first one in a soft turquoise.  It's the color I'm thinking of making Jenn her felted slippers in.  Shhhhhhhh  


Its all soft and saggy so I stuffed it full of paper to keep it upright.  You can see the stitch definition easily at this stage, its stretchy and squishy.

When the knit pod was finished being knit up I threw it into the larundry with our jeans like she suggested.  When it came out it wasn't as felted as I wanted, so instead of starting another load of laundry, that's DH job.  I threw it into a pot of boiling water with some soap.  I mixed it around and took it out to throw it about and rub it together.  After mabie 5 or so minutes of doing that it was felted to where I was happy.  I ran around showing my entire family......like a little kid.  "Look what I made!!!!"


(See no more stitch defination its all fuzzy and when I had dried it stuffed with paper it holds its form)


The first one I followed the pattern and this cute little pod was the result.

Then I took it back down stairs, I wasn't crazy about the color.  Now that I was successful, I had to find fault with it SOMEWHERE.  So I put a wee amount of water back into my small kettle added some more turquoise and then sat the pod into the water.  It only came up to about 2/3 high, which was perfect, the dye wicked up slightly into the lighter area at the top, but left the very top the palest original color.  I just let it sit int he hot dye water until it exhausted all the dye.  Now the bottom is a great dark turquoise that slowly goes off to a pale at the top.


Sooooo sweet, you can see below how small it is.  I stuffed it with paper to hold it's shape again and placed it in the woodstove room. The warm air dried it in about an hour.  I removed the paper and VIOLA!


Now of course I just couldn't stop here, I had to try out other yarns. Uh Oh!  Another addiction??   Hmmmmmm How about handspun?


This yarn is from a scarf kit that I spun but never knit.  It was overspun and not a consistent thickness, I was going to let it rot in my stash.  There was a gray to black on one skein and then a purple to pale pale lilac on the other. I broke the skeins apart and balled them into the same color.  Or as close to it as I could get.  This one starts black then I switched over to the purple.  You can just barely see the change in darkness as it gets to the bottom, the bottom is really dark purple.  


This one is larger like the above picture, I was working with the grays and felt it needed a black stripe to class it up a bit.  Looks like my favorite sweater.


Even the bottom is cool!


See slowly but surely I'm making them bigger


This is more handspun yarn, it has angora and angelina in the yarn but once it was felted you really can't see it. :(
Getting bigger!!  All I did was manipulate her pattern.  More on top on this one before I started expanding the base.

I couldn't leave it there.....I had to do MORE!!


Time to embelish.  
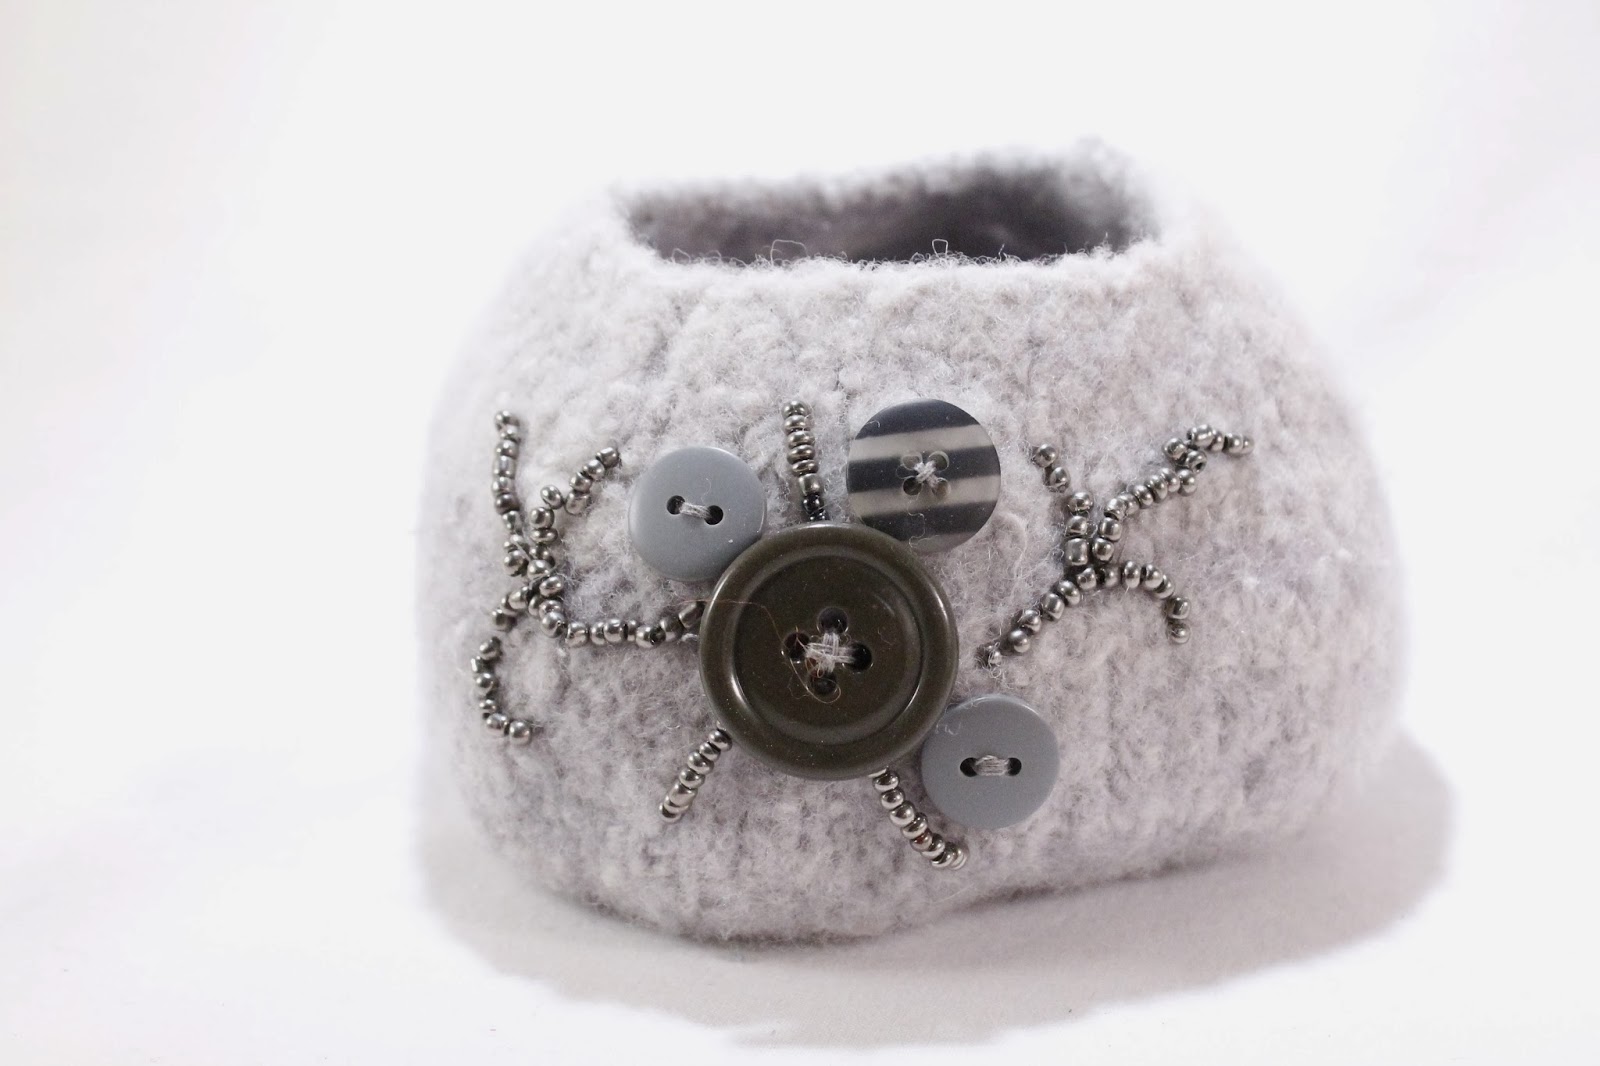
Some seed beads and buttons for this one. Mono-chrome to test it out.


Sweet little un-dyed pod with multi-color seed beads.....I wonder what I can do next??


WOOT another successful craft!
Gonna make a TON of these, some for gifts and some to sell them in the shop.  Keep an eye out!

Happy Felting
DD


Sunday, November 10, 2013

Self Striping yarn - A tutorial

Hello All,
Now that we have our newest KAL going on I thought it would be nice to show you HOW I dye the self-striping yarns we sell in the shop.  Self Striping yarns are a long drawn out process (pun intended).  I have to places that I am able to set up the VERY long skeins.  See the skeins for a self striping yarn are between 20 and 40 feet LONG!  That allows the dye to get attached to a specific amount of yarn.  It's all in the math. (God, I HATE math......)  

We are doing a Self Striping Knit Along in the shop.  Why I agreed to that is beyond me.  So as the custom orders came in from our lovely customers, I began to set up their skeins.  It was a nice day but the back yard was too muddy to skein off in the graveyard (you'll see pictures later and understand it name) so I had to use the front porch.

Here are the orders in plastic bags waiting to be filled.  The cone is on a ladle, yup its a big spoon.  Having the cone ride on something make it easier to get the yarn off smoothly.


Here is the front porch.  I have two plant hangers on either end attached to the pillars.  The Porch is 27 feet long so the entire skein is 54 feet total.  I use my trusty calculator to figure out how many laps I need to take to fill an order.  What you can't see is a hanging counter that I click each time I come back to that end.  Ensuring I have the correct amount of laps.  It is a boring job so I wear my shuffle and jam out.  That counter has saved my bacon quite a few times.  I do get my walking for the day in (depending on how many jobs are in my queue) because you not only skein off to dye but you un-skein onto a niddy noddy when its done.  LOTS of walking.


So I walk back and forth and back and forth until all the yardage is walked off then I tie off where the color changes need to be.


Cone, spoon and the much needed measuring tape.  There is also a calculator, pen, twine, sissors and camera just outside the picture.  


All walked off and ready to hit the studio.  Those Custom Order slips tell me who its for, when it was ordered, when its due, the yarn weight and base, yardage and color requests.  I also do my math on each page.  Leaving notes on how long each color will be etc.  That way, if it goes right I can reproduce it or if I'm off I can go back and see what went wrong.


Darn it wrong photo.  Oh well it will work to get my point across.  I clip together color repeats so that they are dyed at the same time.  Using clothes line clips I attach a note on color and mix recipe (if I have one).  It helps later in the process when I have multiple skeins going at once and I'm tired and can't remember what color comes next.  

All of my self striping yarns are a dip dye.  One one section of the yarn is "dipped" into the kettle at a time.  When its done its pulled out and placed into a bucket to cool and wait for the rest of the skein to be finished.
I use tap water with powdered citric acid to set the dyes.  

Do Not Boil the water!  Simmer only.  It will take as long as it takes to exhaust the dye.  Be patient.   The yarn always looks darker when wet.  Don't panic.


Once the yarn is dyed and dried it goes out to the graveyard.  See what I mean with the crosses etc......
I can't put it back on the front porch because there is shrinkage in all dyed yarns.  Another hard learned lesson.  The skein is now placed on the holders, I attempt to keep the strings all from tangling and twisting but that dosen't always work out so well.  I spent 2 hours skeining off a yarn once when the job should have taken 30 minutes max.  It's a lot like painting, prep is EVERYTHING!!  Take the time to skein off and tie up properly and the un-skeining will go well.  Jump the job and you get yarn barf, pretty barf, but barf just the same.  I would have cut and run, and just redyed the yarn if I had not been under such a time crunch.  So I took the time to untangle each and every strand.  It took me so long that I ended up with a flashlight and my niddy noddy, grumbling the whole way.


You can't see in this picture well but there is a third "holder" in the center.  This keeps the yarn from stretching and keeps it off the ground.  The yarn in the picture is Jenn's for the KAL.  Its called Fallen, Raisin, Razzberry, Silver, Lilac and Gold.  The Razzberry and the Lilac stripes will be thicker than the others. (Hopefully)  Damn math.......  My knitting skills are not the best yet and you need to know exactly how much yarn will be used per round to be able to work out the math correctly.  I didn't know her pattern or what gauge she would be working with so I had to guess.  


I walk back and forth with my niddy noddy - that DH made for me out of teak, yeah he loves me - as I un-skein the dyed yarn from the holders. It takes time and more walking but it's worth it.  The placing of the yarn on the niddy noddy cleans up the skein and makes it uniform again.  It also brings the size down in to a manageable length.  From here balling up into a cupcake is easy and quick with the swift and ball winder.


See center holder too.


Usually it's set up on the side yard, but that was still muddy and I needed the back porch light when the sun went down.  The flashlight was for the tangles......

Here is a picture of the side yard during the summer.  Again you can't really see the center holder.  Overall it's a nice walk back and forth.  My neighbors think I'm a crazy pacer.  Back and forth, back and forth, talking to myself the entire time.  Singing actually, but my voice is so monotone I sound like I'm chanting.  
:P


Finally done, this is my yarn for the KAL.  Its called Tuscany.  All jewel tones, Razzberry, Rusty Orange, Forest Green and a Plum.  The stripes are all uniform and on the larger side.  It's gonna look cool as my fingerless mitts.

I've started them and I'll post a picture of how they are coming out soon.


Hopefully you were able to glean some sort of information from this tutorial that will help you make our own gorgeous self striping yarns.  

Good luck and happy dyeing.

DD